Table of Contents
Barrel Smoke
In recent years the addition of a smoke effect from the cannon barrel has gained in popularity. There are multiple ways this could be accomplished depending on which materials you use. On this page we will describe one method that is relatively inexpensive, but other approaches are possible.
If you wish to participate in a discussion about barrel smokers, please visit this thread on the Open Panzer Forum: Barrel Smoke
Items Needed
Smoke Generator
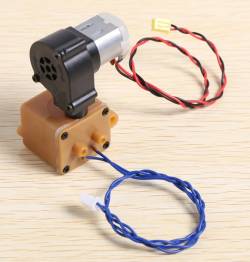
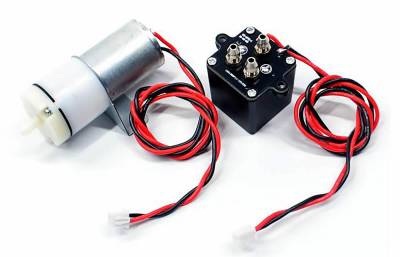
Nearly any smoker could be used, but the common Heng Long reciprocating-pump style smokers do not create the best effect. There is a better option which you can easily find by searching for “7.4V Full Metal Smoke Generator.” These are widely available on eBay and AliExpress. There are often two versions available, one for 6 volts and the other for 7.4 volts, make sure to get the 7.4 volt version (suitable for 7-cell NiMH or 2S LiPo packs).
Dual Channel Relay Module
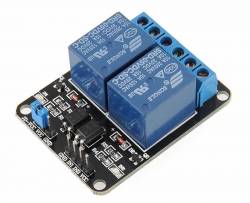
Search for “2 Channel 5 Volt Relay Module” or “5V Dual Channel Relay Module” and you will find these sold all over the place under various brand names. They are frequently used in Arduino projects so are widely available on Amazon, eBay, AliExpress, and plenty of other electronic supply stores. It is a small board with two relays powered by 5 volts. We will control both relays from the TCB using the two General Purpose Outputs, and the relays will in turn provide battery power to our barrel smoker (one for the smoker fan and one for the heating element).
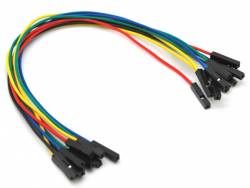
Jumper Wires
Search for “Female to Female Jumper Wires” and again you will easily find these sold on Amazon, eBay, etc… The connector size is the industry standard 2.54mm or 0.1 inch, which you may see in the description, but even if not don't worry, there is really only one size of jumper wire of this type so you can't go wrong. You just want to make sure you get female-to-female because the TCB and the Relay Module each have male pins. These jumpers are basically the same thing as a servo extension cable which could also be used, but we need 4 jumpers and a servo cable only has 3 connections.
Connections and Wiring
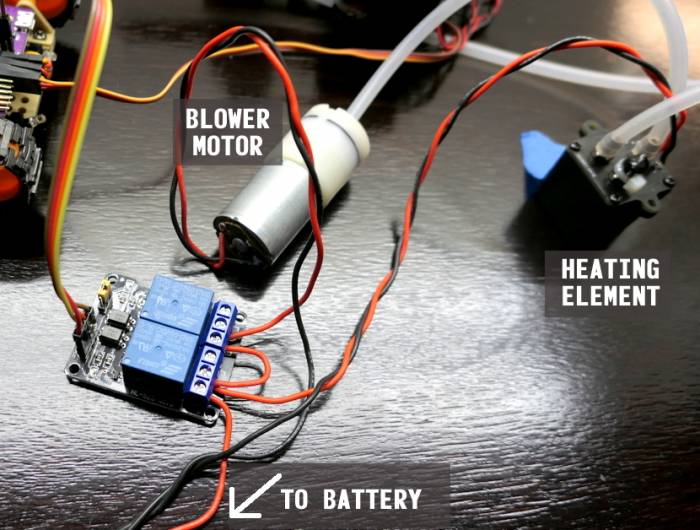
Our smoker consists of two components, a blower motor and the heating element. We will connect these two components to our two relays, which will allow us to provide full battery power to each one. Finally, we will turn the relays on and off with the TCB. Although the relays can switch or pass-through any voltage to the components (we will use them to switch the full battery voltage), the relays themselves are switched on and off with 5 volts, which the TCB can easily provide.
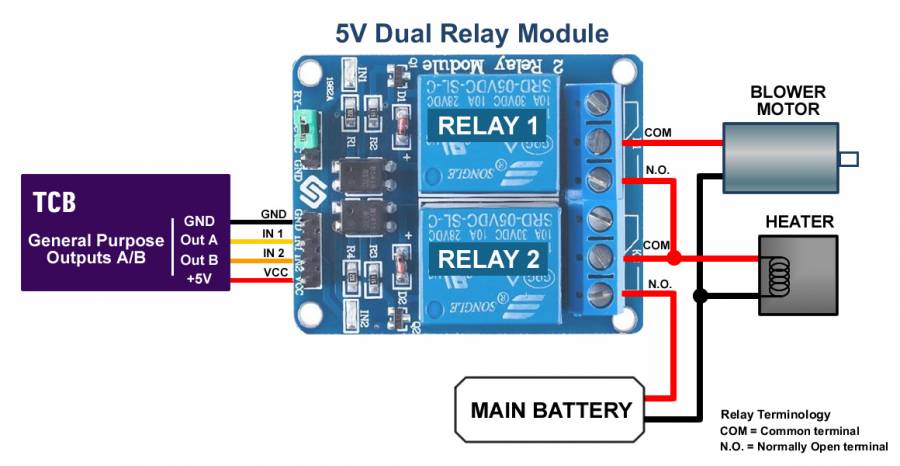
The wiring diagram below shows the connections to be made. We wire the blower motor to the output of Relay 1 and the heating element to the output of Relay 2. If you study the diagram closely, you will see that the Blower motor will not get power unless the heating element is already on, because the Battery Positive voltage comes through Relay 2 first. It doesn't have to be wired this way, but it makes no sense to run the blower motor if there is no smoke being generated, so this arrangement is logical. We will still be able to control each relay individually, but we will first want to turn on the heating element to start generating smoke, and then we will pulse the blower motor to blow it out the barrel.
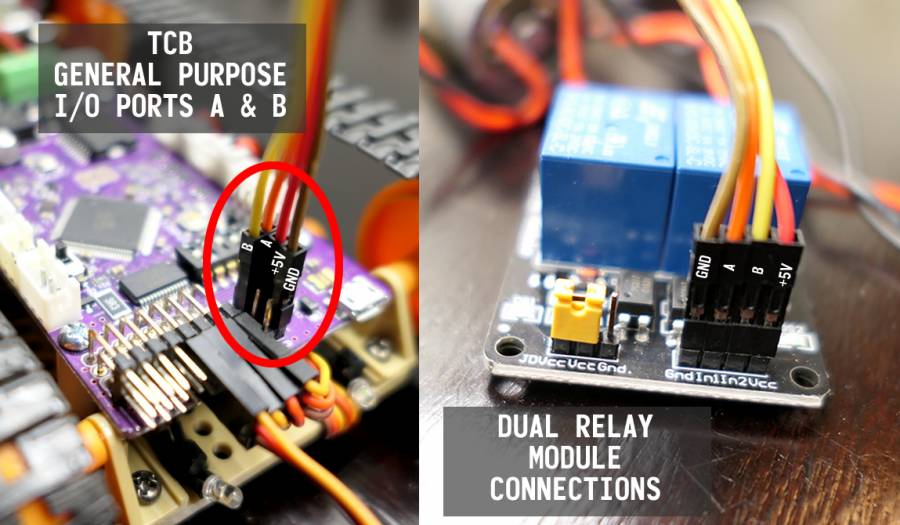
From the TCB we use four female-to-female jumper cables to provide GND, 5volts (also called VCC), and the two signals from General Purpose I/O Ports A and B. We connect Output A from the TCB to Relay 1 (blower), and Output B from the TCB to Relay 2 (heating element).
OP Config Settings
We have two tasks in OP Config - we need to set up the General Purpose I/O Ports, and then we need to create the necessary function triggers.
General Purpose Ports Setup
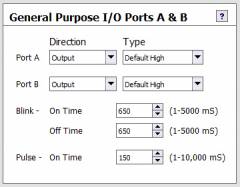 Go to the Lights & IO tab of OP Config and look for the heading General Purpose I/O Ports A & B. Set the Direction of both Port A and B to Output. The Type setting will probably need to be set to Default High but this can depend on the relay module you are using. However most of them require a “low” signal to activate the relays, meaning that they “default to high.”
Finally you can adjust the Pulse time, which will correspond to the length of time the barrel smoke fan will run when the cannon is fired. Experiments show this does not need to be very long, something in the range of 150 mS works well. (The Blink times will not be used, you can ignore those.)
Function Trigger Setup
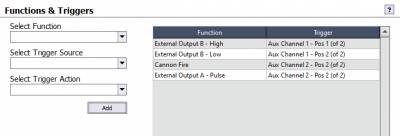 Now go to the Functions tab of OP Config and create four function triggers. An example is shown in the image at right, but of course you are free to use different Aux Channels and different switch positions according to your preference. First let's setup the heating element relay, which we wired to I/O Port B. We don't want the heating element to be on all the time, so we assign the High and Low states of External Output B to a two-position switch on our transmitter (in the example, this is Aux Channel 1). If your relay module is like most, the High state will actually be relay off, and the Low state will be relay on. We are now able to turn on/off the heating element relay.
Secondly we want to “pulse” (briefly turn on) the smoker fan relay, and we want this to happen at the same time that we fire the cannon. In the example we see that our Cannon Fire function is linked to Position 2 of Aux Channel 2. Therefore we assign a second trigger also to Position 2 of Aux Channel 2, and this time the function will be External Output A - Pulse.
Now, if we have the heating element turned on, and if we fire the cannon, the barrel smoke fan motor will run for the length of time specified in the Pulse setting above, and this will send a puff of smoke out the barrel.
Further Notes
Note: there is another smoker called the “Heng Long Smoke Generator 6.0S Version” that looks a little bit like the original pump-style smokers but is actually fitted with a direct drive blower motor. This is a good design for the barrel smoke effect, and it has the advantage of being smaller in size than the “All Metal” version shown above, HOWEVER, these units are only rated for 6 volts! Since most people are using 6-7 cell NiMH batteries or 2S LiPos that will be too low. If you want to use this smoker you will need to also use a voltage regulator to drop your battery voltage down to 6 volts. The voltage regulator would need to be installed between the Main Battery and power to the two relays in the “Wiring diagram” above.
